20080502

Vintage TV Mod, Part III

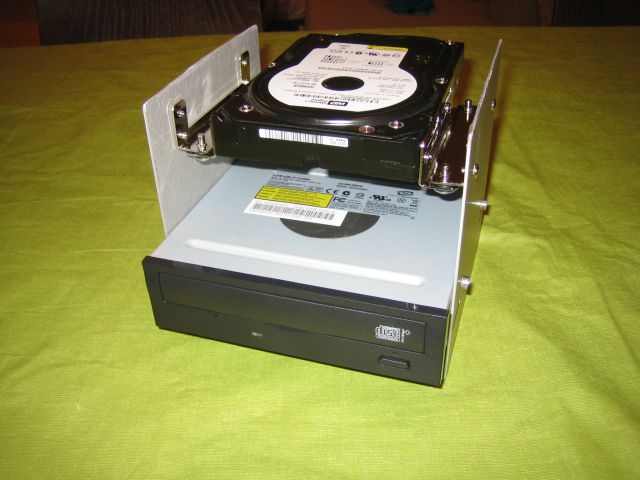
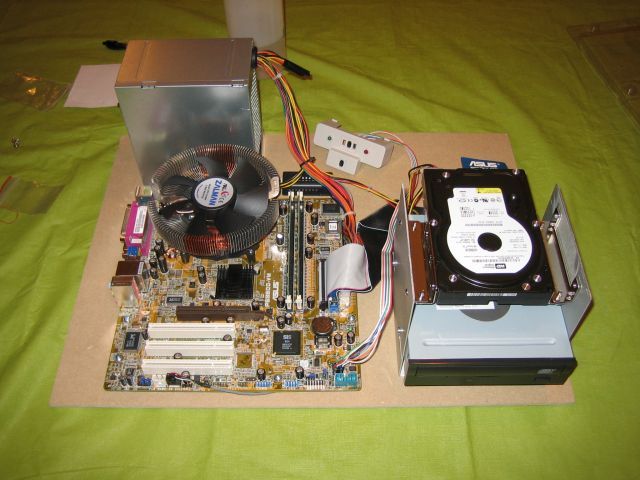
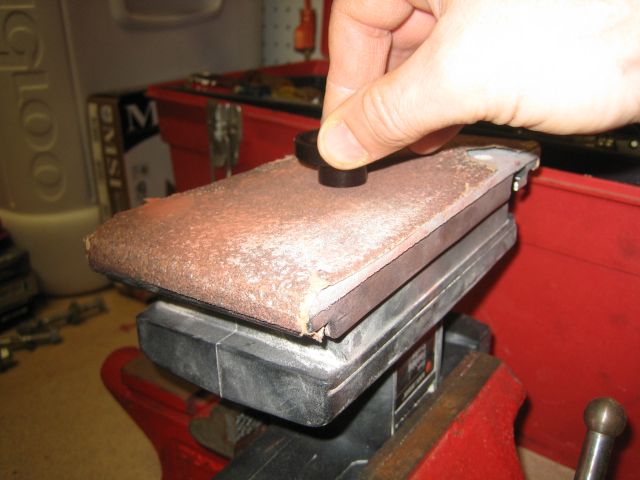
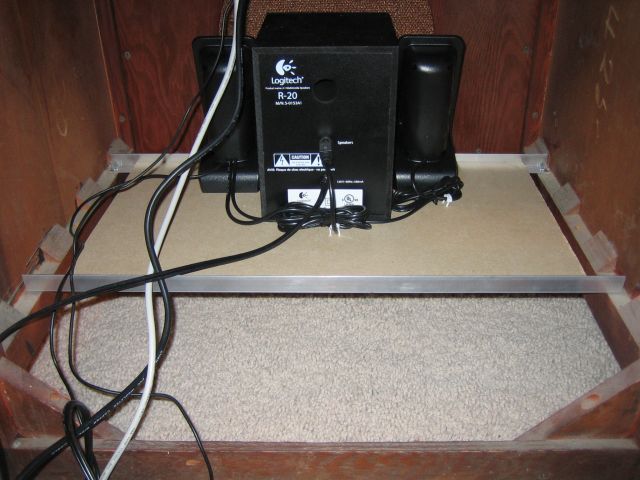
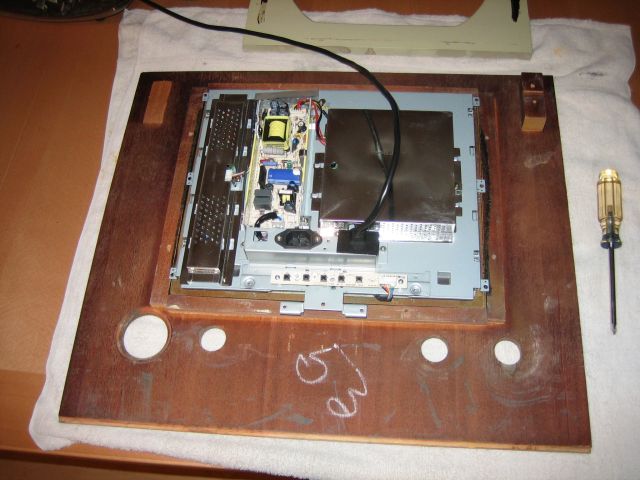
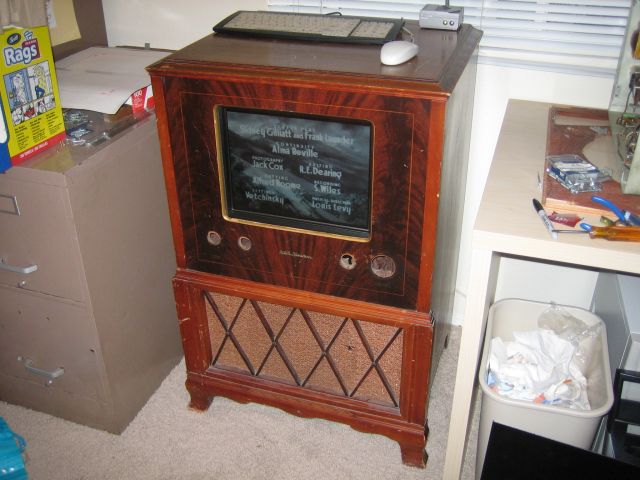
Last time, I mounted the LCD display to the front panel and got a pretty good looking test out of it. Now it's time to put the computer electronics and knobs on this thing. First up, I built up a bracket to hold the hard disc and CD-ROM drive. This arrangement turned out to be nice and stable, and allowed me to use a vibration dampening 3.5” to 5.25” drive adapter kit to help keep the hard drive quite. I then mounted the drive cage, mother board, and power supply to a piece of 1/4” MDF that I had pre-cut to fit inside the cabinet where the old chassis used to be, making sure to leave room for the LCD monitor. I used a large, quite Zalman CPU fan to keep noise to a minimum. Once everything was mounted to the sub-panel, I placed it inside the cabinet and screwed it down. Next, I built a small shelf for the bottom half of the cabinet where the speakers would sit. A couple of lengths of aluminum L channel span the width of the cabinet, and a small piece of MDF forms the shelf. I purchased a cheap 2.1 Logitech speaker system, and screwed the speakers to the shelf, facing out through the old speaker grill. I put a piece of black electrical tape over the power lamp to keep it from showing through the grill cloth.

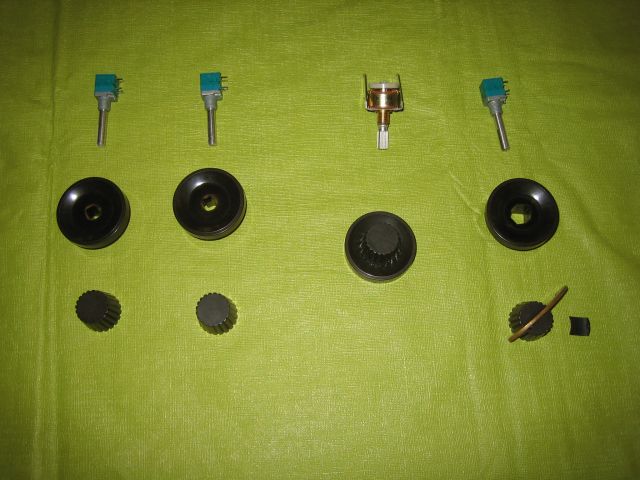
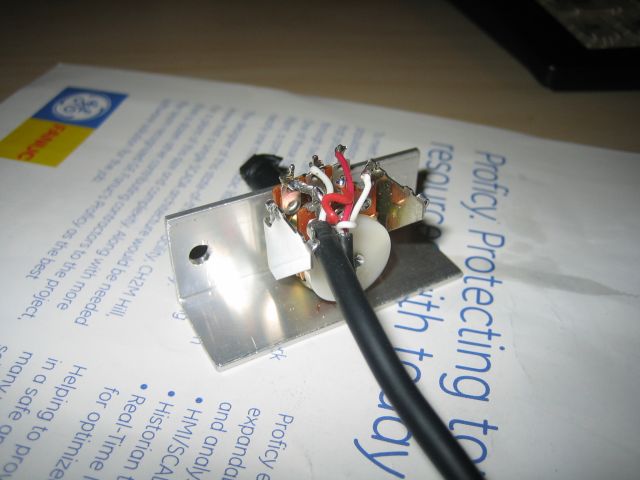
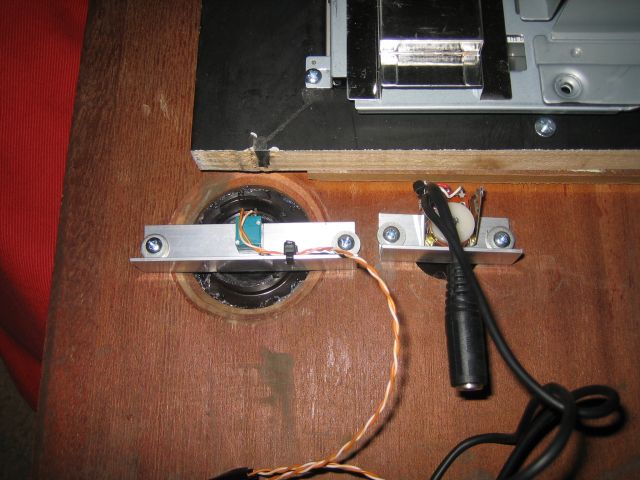
Next, I purchase some potentiometers from the ultra cool surplus store Electroncs Goldmine, three with a momentary push switch feature, and one dual potentiometer to be used as the volume control. Two of the potentiometers were just dummys to hold the knobs, although they could be used for something in the future. The remaining switch-pot was wired up to the power switch connections on the mother board, so I could turn the computer on and off by simply pressing the knob. The dual potentiometer was wired up as an attenuator with a standard stereo 3.5mm plug on one side, and a 3.5mm stereo jack on the other side. The plug then connected to the line out on the mother board, and the speakers plugged into the plug on the other end. Now I have a nice physical volume control, just like the original set! I had to grind off the back of the volume knob to get it to fit onto the short shaft of the audio pot, but the other shafts fit perfectly into the original knobs that came with the tv. I used short pieces of aluminum L channel to mount the pots to the front panel, then adjusted the depth of the shafts using the nuts to get the knobs just the right distance from the front panel.
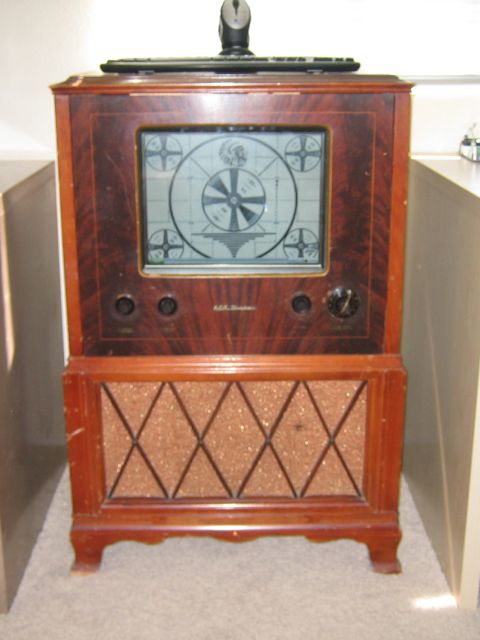
Once I had all the mechanical aspects taken care of, I mounted a power strip to the under side of the chassis shelf and plugged everything into that, so I would only have one cord leaving the cabinet. A WI-FI card was used for the network connection, and a wireless keyboard and mouse was added, so that only only the power cord came out of the back of the TV. As a final touch, I mounted an amber LED at the bottom of the cabinet where the old power lamp used to be, and drove it off the Power LED connection on the motherboard. I tracked down old Indian Head test pattern for the desktop wallpaper, and it was done. The kids have watched countless movies and hours of TV on the set via the SlingBox, and an old, broken TV was given a new life.


I hope this project inspires others to take the plunge and put computers in other unexpected places. If you do, post a comment or send me an email to let me know about it.

Read More......

20080426

Ubuntu 8.04 Hardy Heron Synergy Client Setup

In the Teknynja cave I have a MS Windows XP box with two monitors (my main development system) and a Ubuntu box with one monitor (my Internet offload system). I use Synergy to control the Ubuntu system using XP's mouse and keyboard. Since the Ubuntu box doesn't have a keyboard or mouse connected to it, a little hacking is required to get the Synergy client running before the login screen. I've been doing this with my Ubuntu 7.04 system for a while, and now that I am setting up a replacement Ubuntu 8.04 system, I thought I would document the Synergy client setup for future reference. It should be noted that I installed Ubuntu Hardy Heron from the Alternate CD, but that should not make a difference for this procedure. I also assume that you already have the Synergy keyboard/mouse server configured and running somewhere on your network.

First, install Synergy on the Ubuntu system using:

sudo apt-get install synergy

Then edit the gdm initialization file:

sudo nano /etc/gdm/Init/Default

and add the following lines just before the “sysresources=/etc/X11/Xresources” line

/usr/bin/killall synergyc
sleep 1
/usr/bin/synergyc xxx.xxx.xxx.xxx

where xxx.xxx.xxx.xxx is the IP address of your server machine.

Now edit the gdm pre-session file:

sudo nano /etc/gdm/PreSession/Default

and and the following line just before the “XSETROOT='gdmwhich xsetroot'” line

/usr/bin/synergyc xxx.xxx.xxx.xxx

Make sure the Synergy server is configured and running on your keyboard/mouse system, and reboot the Ubuntu system. You should now be able to move the mouse over to the Ubuntu screen and login normally.


Note that I still consider myself a Ubuntu/Linux noob, and so any improvements/comments/suggestions you have about this post are greatly appreciated. Ymmv. Most of the help I needed setting up this configuration came from the Ubuntu Synergy How To page.

Read More......

20080425

Vintage TV Mod, Part II

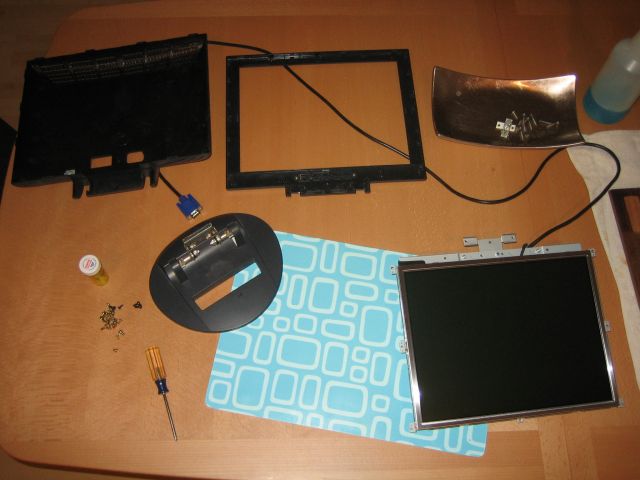
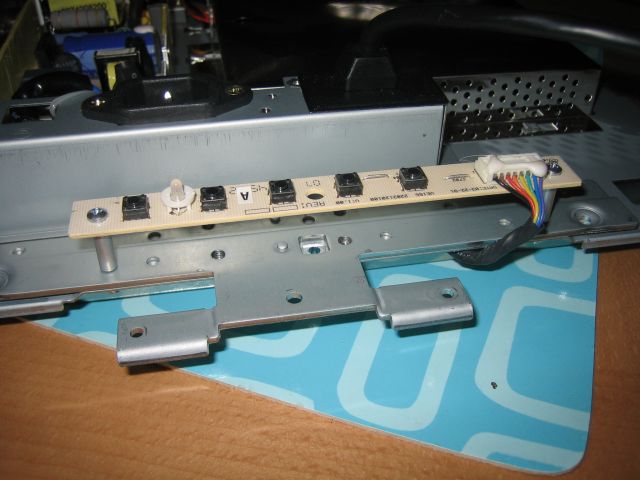
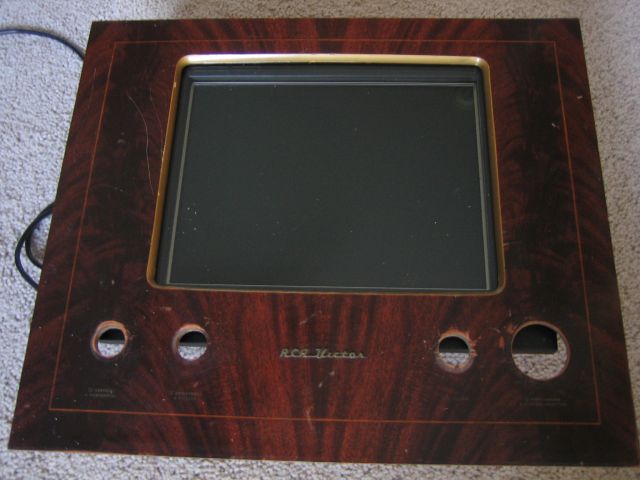
In our last installment, I gutted the old television cabinet and prepared it for the updated electronics. This time, I'll cover the real heart of this mod, the LCD display.I removed the old CRT bezel from the front panel of the TV, because even though it would have looked cool to have an old-fashioned round screen, it would have covered some of the essential parts of the display, like the menus and title bar controls. I had an old 15” LCD monitor sitting out in the garage after I updated to a wide screen monitor on my workstation, so I grabbed it and checked to make sure that it would remember its power state when the AC was removed – I didn't want to have to be constantly pressing a button to turn the monitor on.After verifying that that the power worked as needed, I disassembled the monitor case and removed the screen and electronics. I then used some standoffs to mount the control buttons on the back of the monitor, so I would be able to access them from inside the case once it was mounted in the cabinet.The actual display panel was a little bit smaller than the glass opening at the front of the TV, so I found a simple black picture frame to act as a bezel and mounted it to the front panel. I was then able to use the original mounting tabs on the LCD panel to attach it to the picture frame.You could still see a little of the metal frame of the LCD panel inside the frame, but it didn't look too bad, and I'd rather be able to see all the pixels on the screen anyway.After getting everything mounted and placed back into the cabinet, I connected it up to power and a PC to see what the display would look like. Of course, I had to try out an old black and white movie on the newly mounted screen – the effect was rather convincing! Next time, on “This Old TV”, I'll show how I put the knobs back on and made them functional, as well as the replacement speakers for the set.

Read More......

20080420

“Time” to Geek

One of my wife's friends traveled to England a few weeks ago, and brought back a special item that I requested. Just in case my status as a geek was in question, this item should eliminate any doubts. The item is my newly acquired Doctor Who 2008 Calendar.I know, the year is already a third over, but I've been eying this calendar since before Christmas. The only reputable place I could find to order it online was Amazon UK, but the shipping was just too much. So when my wife's friend asked if there was anything I wanted when she went to England, I didn't hesitate. I have been a fan of the show since I was a young boy, watching episodes on Saturday mornings on the local PBS station, sometimes with my dad.
They say you imprint with your first doctor, which for me was Jon Pertwee, but my favorite doctor is actually Tom Baker, with his arrogant, Sherlock Holmes style. There is plenty on the web written about Doctor Who and all the doctors, so I won't try to cover that ground again here. The original series ended in 1989, but a new series started up again in 2005, and I still look forward to each episode. I am also a big fan of the spin-off series Torchwood, which is a great show in it's own right. Torchwood is a bit too adult for my little girl, but another Doctor Who spin-off, The Sarah Jane Adventures is aimed at the younger set and usually keeps my daughter on the edge of the couch. And in case the whole Doctor Who thing doesn't cement my geek status, ask me to talk about Red Dwarf or Blake's Seven some day.

Read More......

20080419

Vintage TV Mod, Part I

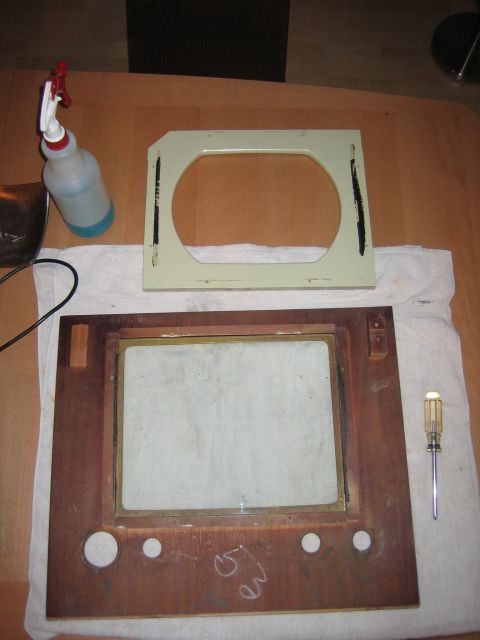
I've had this old 1943 RCA/Victor television set kicking around for many years now. When I first got it, you could actually watch tv on it, but after a year or so, it stopped working (probably desperately in need of a complete capacitor replacement). For years I was gonna do that as a project, but never got around to it. The set was used mainly as something to set knick knacks on for a long time until I finally had an idea – I would turn it into a meda pc for the kids. In the long run, it would probably be less work than fixing the old TV, and via my Slingbox, we would still be able to watch TV on it!


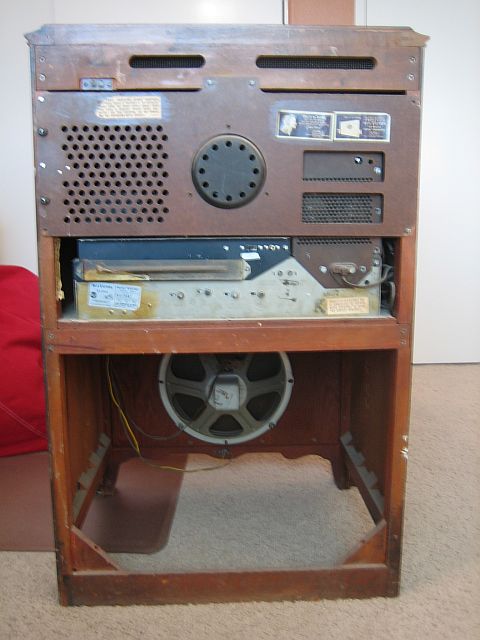
First, I needed to gut the cabinet to make room for the new components.

These old TV's were built to be serviced, so getting the chassis out was simple, although I used a little extra caution around the old picture tube. I didn't want it imploding all over me, and I might be able to sell it on eBay some day.

Once gutted, I removed the front bezel and did a little repair to the side panel of the cabinet, which had come loose at some point. I guess I could have attempted to restore the case since it is so scratched up, but since this was going to be used by the kids (and because I am very lazy), I decided to leave it in it's “vintage” condition. In my next post, I'll cover getting the new LCD installed in the set. Stay tuned!

Read More......

20080413

Mod Home Mod


Well, it's official. I'm gonna have to bust out my home-hacking skills. My wife and I have finally ordered the cabinets for our kitchen remodel. We've been planning to do this for over a year, but a long series of life events kept pushing it back. But last Friday, we finally dropped off the kids with some friends, drove down to the San Diego Ikea, and spent about an hour building the order once we got there.

Of course, I have a few rants about this whole process. First, I've been using the Ikea HomePlanner software to design and layout our kitchen. This has to be one of the most frustrating pieces of software on the planet! First off, it puts several artificial limits on how you can place items in the design. For example, do you want to stack cabinets on top of each other? Sorry! Well, there are a few workarounds you can use to try and get close to the layout you want, but they aren't very intuitive and still don't always give you the results you are looking for. Next up is the fact that some items in the catalog can't be configured with all of the available colors, so the parts list has the wrong color called out for some items (along with the rendering not looking right). Add to that the fact that even on my quad-core machine, it would take a 10-15 second nap every minute or two (I assume it was making some kind of backup) forcing you to wait and wait and wait. And those backups were definitely needed, as about once each session, it would just completely crash! I know what you are thinking, just another noob with some bizarre hardware/software configuration blaming the software for weird behavior – but I ran this app on several different machines, all with the same behavior. And at IkeaFans, there are plenty of tales of woe about this program. Many have given up on it all together and use Google Sketchup instead.

So after wrestling with the software, I finally save off a file to my USB flash drive, remembering that they have several customer PC's in the kitchen section of the store running the planner software. We we arrive at the service desk, our Ikean asks if we have our plans from the designer and I say, “Sure, right here on this flash drive” to which he responds “We can't access flash drives from here.” WTF? Fortunately, my wife suggested printing out the plans just before we left, saying not everyone was as technically inclined as the Teknynja – I told her “Everyone uses flash drives.”, but printed out the plans just to be on the safe side. I should just know that she is always right, and not even argue with her. There is also the option to upload your plans directly to Ikea, but I was too lazy to create an account just for that! This is apparently the only way to get your plans to Ikea for ordering. It would be nice to know that before driving an hour to get to the store.

Anyway, the cabinets should get here in about a week, and then we have a couple of weekends of other obligations before I start tearing out the old kitchen, fixing up the walls, and start building and installing cabinets. I get to dust off my mechanical and woodworking skills for a little physical, real world hacking. I'll keep you posted if anything interesting happens during this project.

Read More......

20080408

Have Mercy On Me

I usually have a couple of hours to kill during my commute to and from work each day, so I end up listening to a lot of podcasts. Today, on the way home I was listening to the latest from the Ethical Society of St. Louis. Each of their platform addresses inspires me to think a little more about how I go about living life, and I find the leader of the society, Kate Lovelady, conveys her thoughts and insights about ethical living and ideals in an entertaining, yet thought-provoking manner. This week was the conclusion of her two part series, “From Vengeance to Mercy”, where she addresses some of the over-arching elements of our society and how they cause us to diverge from a more ethical community. I recommend these two addresses to anyone who would like a better understanding of forgiveness and mercy. And for a weekly dose of thought-provoking, insightful, and interesting topics relating to ethics, subscribe to the whole feed. I sure wish we had an organization like this around these parts!

Read More......
 
Template design by Amanda @ Blogger Buster