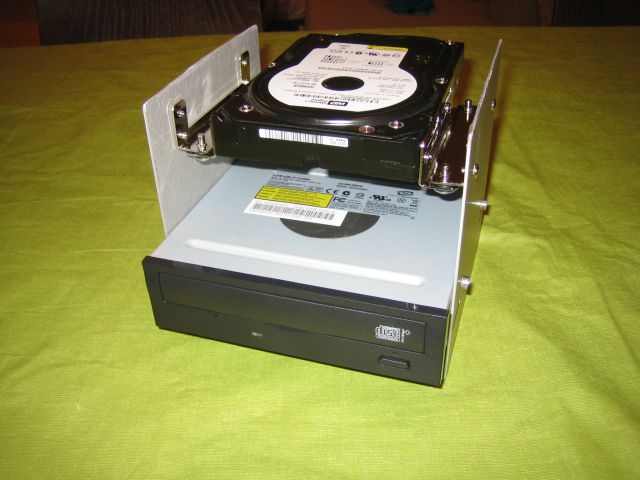
Last time, I mounted the LCD display to the front panel and got a pretty good looking test out of it. Now it's time to put the computer electronics and knobs on this thing.  First up, I built up a bracket to hold the hard disc and CD-ROM drive. This arrangement turned out to be nice and stable, and allowed me to use a vibration dampening 3.5” to 5.25” drive adapter kit to help keep the hard drive quite. I then mounted the drive cage, mother board, and power supply to a piece of 1/4” MDF that I had pre-cut to fit inside the cabinet where the old chassis used to be, making sure to leave room for the LCD monitor.
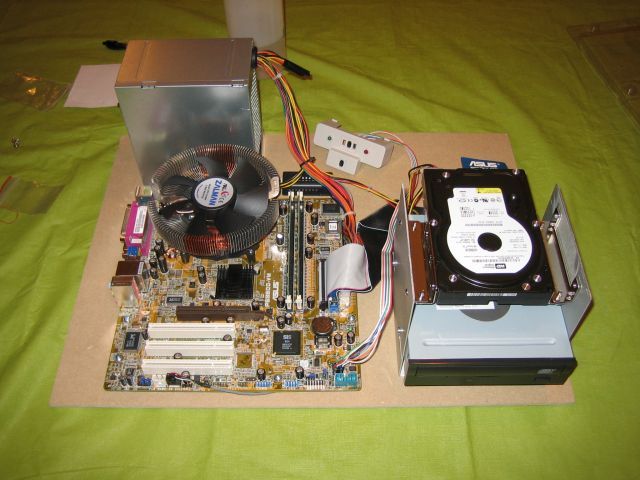
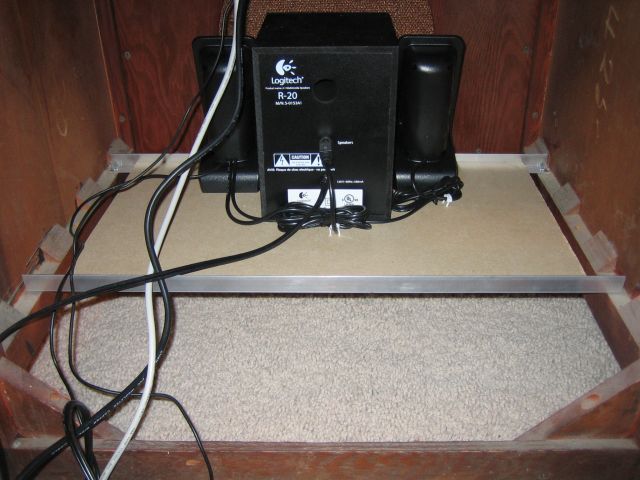
  I used a large, quite Zalman CPU fan to keep noise to a minimum. Once everything was mounted to the sub-panel, I placed it inside the cabinet and screwed it down. Next, I built a small shelf for the bottom half of the cabinet where the speakers would sit. A couple of lengths of aluminum L channel span the width of the cabinet, and a small piece of MDF forms the shelf. I purchased a cheap 2.1 Logitech speaker system, and screwed the speakers to the shelf, facing out through the old speaker grill. I put a piece of black electrical tape over the power lamp to keep it from showing through the grill cloth.

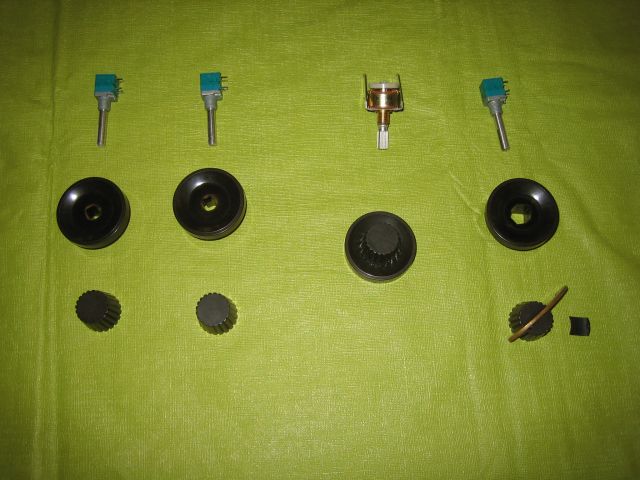
Next, I purchase some potentiometers from the ultra cool surplus store Electroncs Goldmine, three with a momentary push switch feature, and one dual potentiometer to be used as the volume control.  Two of the potentiometers were just dummys to hold the knobs, although they could be used for something in the future. The remaining switch-pot was wired up to the power switch connections on the mother board, so I could turn the computer on and off by simply pressing the knob.
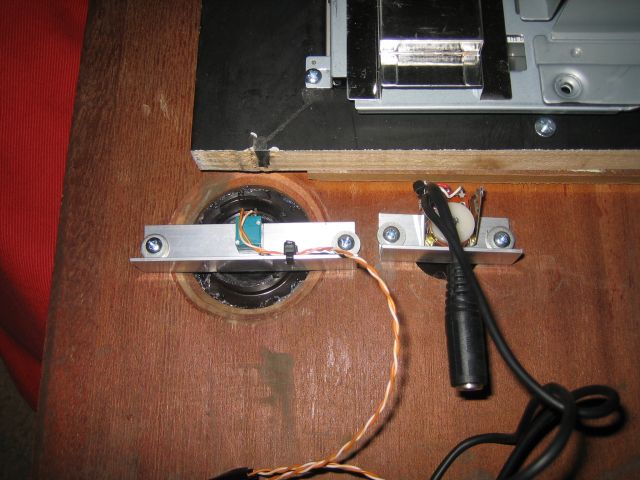
  The dual potentiometer was wired up as an attenuator with a standard stereo 3.5mm plug on one side, and a 3.5mm stereo jack on the other side. The plug then connected to the line out on the mother board, and the speakers plugged into the plug on the other end. Now I have a nice physical volume control, just like the original set!
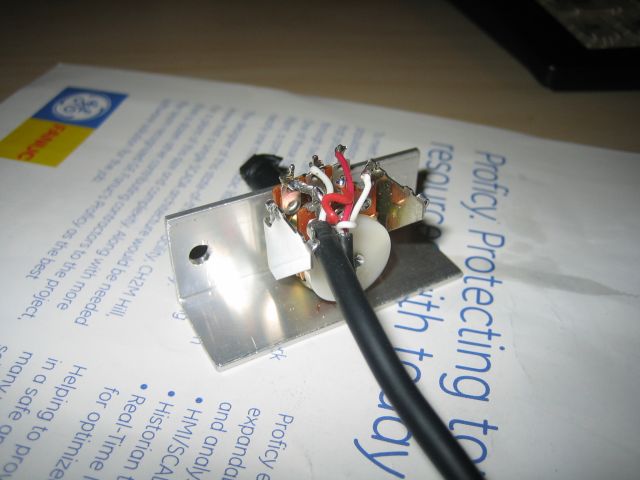
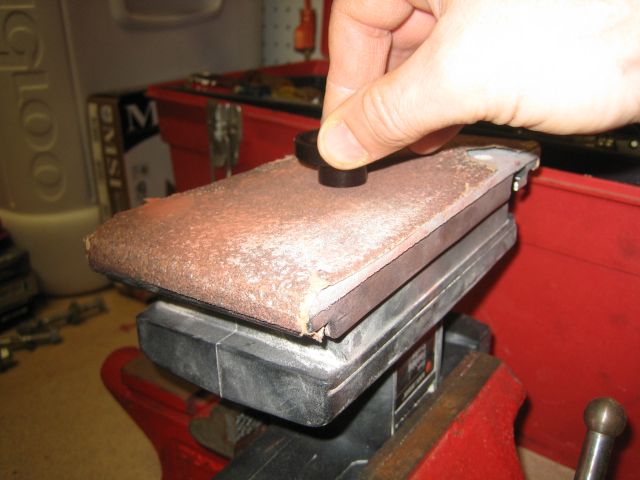
  I had to grind off the back of the volume knob to get it to fit onto the short shaft of the audio pot, but the other shafts fit perfectly into the original knobs that came with the tv.
  I used short pieces of aluminum L channel to mount the pots to the front panel, then adjusted the depth of the shafts using the nuts to get the knobs just the right distance from the front panel.
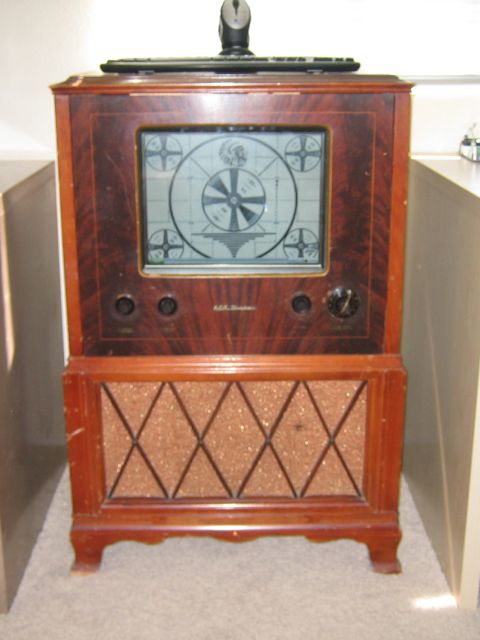
Once I had all the mechanical aspects taken care of, I mounted a power strip to the under side of the chassis shelf and plugged everything into that, so I would only have one cord leaving the cabinet. A WI-FI card was used for the network connection, and a wireless keyboard and mouse was added, so that only only the power cord came out of the back of the TV. As a final touch, I mounted an amber LED at the bottom of the cabinet where the old power lamp used to be, and drove it off the Power LED connection on the motherboard. I tracked down old Indian Head test pattern for the desktop wallpaper, and it was done. The kids have watched countless movies and hours of TV on the set via the SlingBox, and an old, broken TV was given a new life.

I hope this project inspires others to take the plunge and put computers in other unexpected places. If you do, post a comment or send me an email to let me know about it.

3 comments:
beautiful! I just acquired a 1950 Emerson model 666 tv/radio/phonograph cabinet that's missing the phono and tv, and was planning on doing exactly what you've done, except I plan on using it as our main television in the living room. You certainly inspired me, and I figured since no one else has commented, I should probably tell you so.
This project will take me some time as money seems to be scared of me, but when I've finished I'll send you a link to pics of the whole project. I've got a pic of the cabinet as it is now, let me know if you're interested in seeing it.
Thanks for the feedback, and glad you like it! Since I posted this article, I've also added a joystick and some games for the kids, along with dual booting Ubuntu on it! Now my 4 year old son uses it almost constantly!
Sounds like you've got a great cabinet to work with, I would be interested in seeing it to see what other options are out there. And of course, if you have any questions, feel free to ask!
If you are doing this for your living room, you might want to look into a PC compatible remote control for it, that really makes it feel much more like a real "TV".
Hope you have fun with your project when you get around to it, I know I did.
I don't know that I'd have the guts to hack up an old TV like that, but this turned out beautifully! Only thing I might have done different is use an old CRT monitor to keep it as authentic as possible (and spare having to haul yet another one to the dump).
I have (actually its my moms) an old Zenith cabinet from just about the same era that someone has already gutted and its just the bare cabinet. Only challenge would be recreating the front bezels, speaker grills, knobs etc as those are all missing too.
But I continue to be inspired by people who take old things like this and make them useful again.
Post a Comment